Once you’ve chosen your domain name and hosting plan, it’s time to complete your purchase.
Before you start, we recommend reading Guide 1 and Guide 2 first. Once ready, visit the Checkout page to begin.
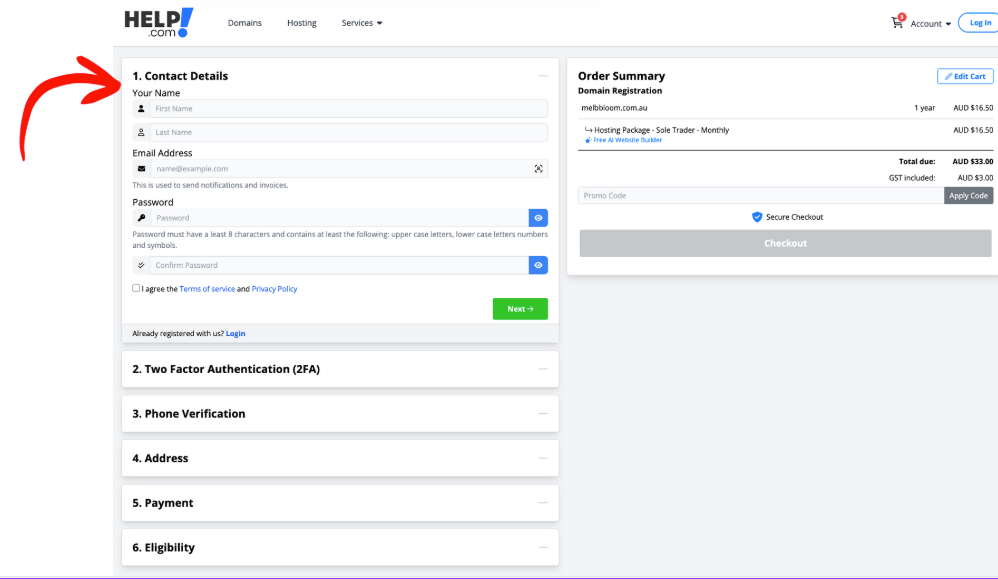
Step 1: Enter Your Account Details
On the checkout page, you’ll begin by filling in your name, email address, and creating a password. Once completed, click Next.
You’ll then receive a confirmation email. Please open your inbox and validate your email address before moving forward.
Step 2: Set Up Two-Factor Authentication (2FA)
This section helps secure your account. You can either:
- Scan the QR code using your preferred authentication app
or - Manually enter the code shown on screen.
Then click Verify Code.
Note: While 2FA isn’t mandatory, we strongly recommend setting it up to protect your account.
Step 3: Verify Your Mobile Number
Enter your mobile phone number and ensure your country code is correct.
You’ll receive a 6-digit code via text message. Enter the code, then click Verify Phone.

Step 4: Add Your Company and Billing Information
In this section, provide your company name and billing or business address.
Once complete, click Next.
Step 5: Enter Your Payment Details
Provide your payment details using Mastercard, Visa, or American Express, then click Next.
Step 6: Provide Eligibility Information (If Required)
If your domain ends in .au, you’ll need to supply eligibility information such as an ABN, ACN, or Trademark Number.
Toggle this option and enter your details before proceeding.

Step 7: Review Your Order Summary
On the right-hand side of the checkout page, review your order summary carefully.
Check that your domain name and hosting package are correct and that you’re satisfied with your selections.
When ready, click Checkout to finalize your purchase.
Step 8: Confirmation and Next Steps
After completing checkout, you’ll see a Thank You page with your Order ID and confirmation that your order has been placed.
From here, you can either:
- Navigate to your Dashboard to view and manage your services
or
- Click Build Website to use our AI Website Builder and begin creating your site.
You can learn more about this in Guide 4: How to Use Help.com’s AI Website Builder to Create Your First Website.